NEWS
This article will provide a detailed introduction to the key points of appearance quality inspection for ductile iron pipes, helping procurement personnel and project managers to accurately control and ensure the quality of the selected pipes. So, what specific aspects does the appearance quality inspection include?
Visual Inspection
The surface of the ductile iron pipe is checked for smoothness and flatness through the naked eye. Any cracks, dents, or other defects should be identified. This step is simple but crucial, as it can quickly detect obvious surface issues.
Product Appearance Quality Issues
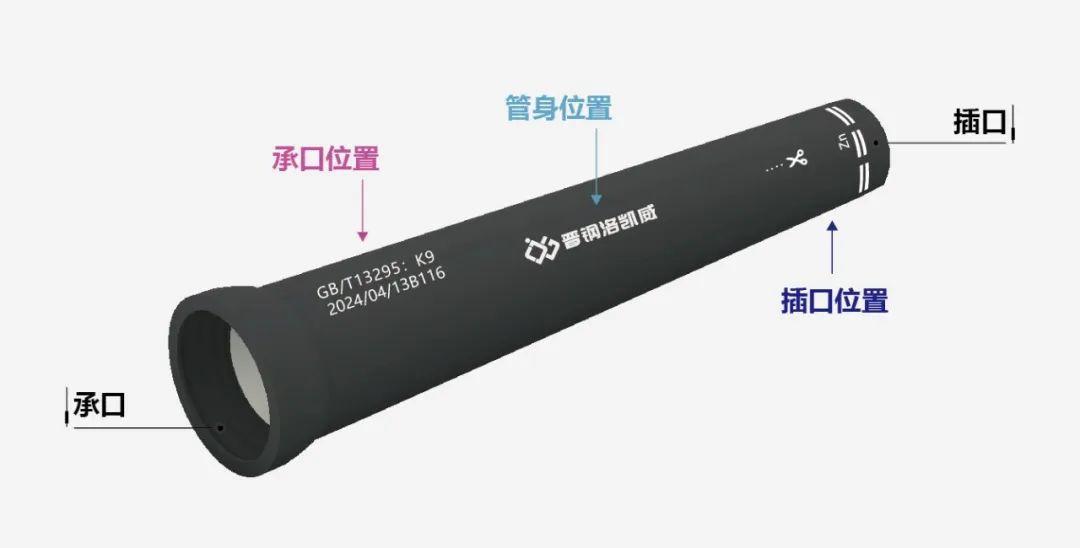
Marking Inspection
Ductile iron pipes typically have markings on the pipe body that indicate the manufacturer's name, product grade, standard specifications, production date, and other information. These markings serve as proof of the product's identity and are an important reference for tracing the product's origin and quality.

Coating Inspection
The inner and outer surfaces of ductile iron pipes are usually coated with an anti-corrosion layer to enhance their resistance to corrosion. It is essential to check if the coating is uniform and complete, with no signs of peeling, cracks, or other defects. The quality of the coating directly affects the performance and longevity of the pipeline.
Product Liner Quality Issues
Dimensional Accuracy Measurement
Measuring tools such as tapes, micrometers, and thickness gauges are used to measure the various dimensions and wall thickness of ductile iron pipes to ensure the product meets specifications.
01 Socket/Spigot Roundness Measurement
Using a standard round and caliper, measure the socket and spigot ends of the pipe to confirm that the roundness tolerance falls within the required range.
02 Socket/Outer Diameter/Pipe Length Measurement
Different measuring tools are used to measure the pipe body length, socket, outer diameter, and the length from the socket to the spigot.
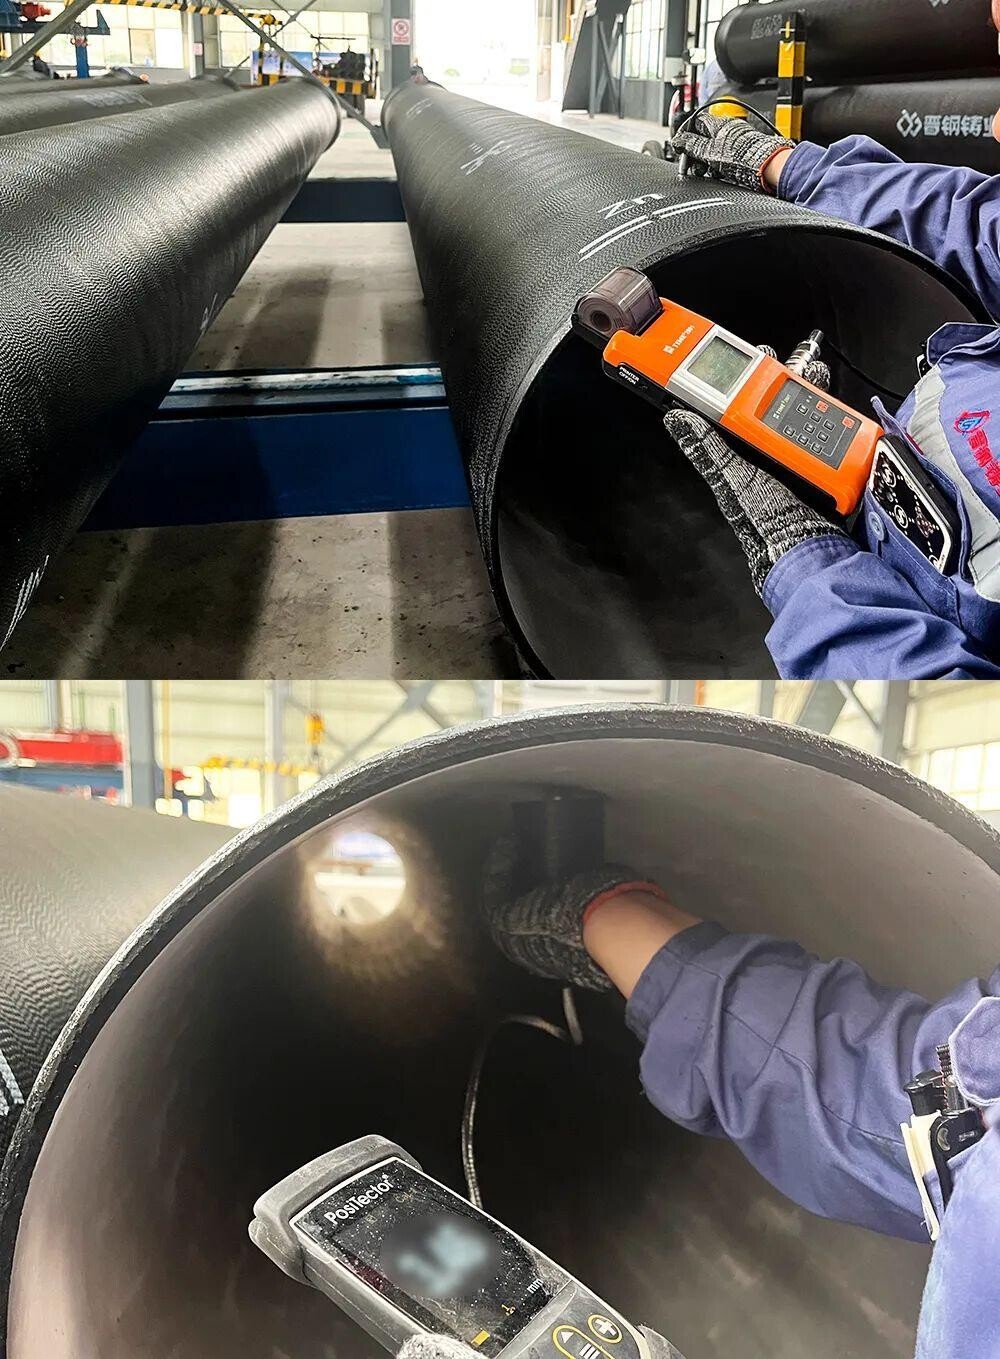
03 Wall Thickness/Liner/Coating Layer Thickness Detection
For the liner thickness, steel nails are used at both ends of the pipe to check the depth of the mud marks, and calipers are used for measurement. The pipe wall thickness and coating layer thickness are checked with specialized precision instruments for spot measurements.
 The appearance quality of ductile iron pipes not only affects their aesthetic appeal but also directly influences their corrosion resistance and service life. As a leading manufacturer of ductile iron pipes, Jinsteel Casting ensures comprehensive quality assurance for each pipe through rigorous testing processes and advanced technological methods.


